Clone a project on Codeplex to your own Codeplex repo with Mercurial.
Published on Mar 02, 2010If you use Github (Git) or Bitbucket (Mercurial) you are familiar with the ability to fork a project into your own repository in those sites.


Once forked you can start working in your own repo and once you are ready to integrate you will send a pull request to the master repository.
Codeplex recently started using Mercurial but it doesn’t have (or I couldn’t find) a way to clone a project directly from inside Codeplex.
UPDATED March 5: Yesterday Codeplex added support for forks when using mercurial.
First, cloning to your local computer
You need to have TortoiseHg installed on your computer before going forward with this tutorial.
First you need to check out the project you want to fork using the clone url:
Go to the source control page of the project and click on the source control connection instructions.

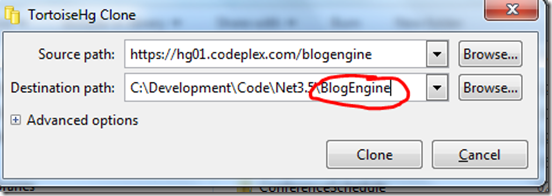
Copy the clone url and open the TortoiseHg clone window.

Enter the repository url as the source path and select a folder where to clone the repository. If you don’t have a folder already created for this repo, just add the name in the destination path text field and the folder will be create.
Second create a project on Codeplex and add as a Sync source.
Log into Codeplex (or create an account) and create a project where you want to work on, make sure you select Mercurial as your source control.
You should be able to also use Google code to host your clone, everything should work the same, just make sure you use Mercurial as well.
Once the project is created go to your new project source control page and copy the address to your repository.
In your computer open the properties of your cloned repository (the one we cloned in the previous step).

Go to the sync tab and click in the Add button.
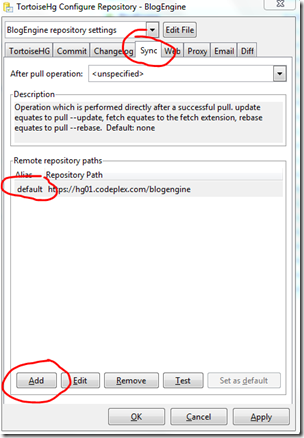
Notice that the default (an only) repository is the original one, we want to add the repo to our newly created project and set it as default.
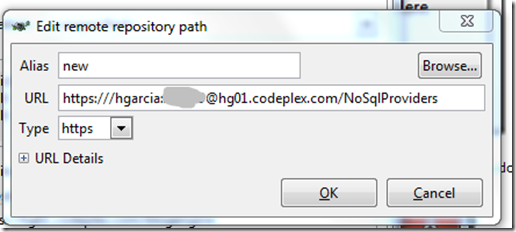
If you are using https authentication make sure you add your username and password following this form: https://username:password@hg01.codeplex.com/repository
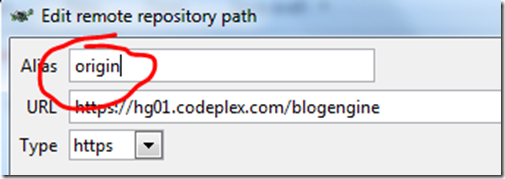
Add any Alias name but not “default”, not now. Click Ok.
Select the Remote repository marked as default and click the edit button, change the alias from default to “origin”.
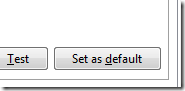
Now in the sync dialog select the new repository (the one pointing to your project) and click the Set as default button.
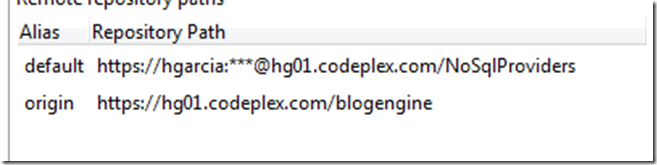
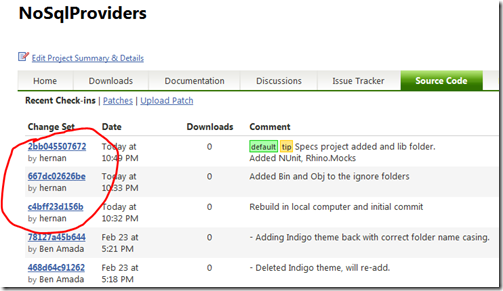
Once done you should have something like this, the name of the projects should reflect the projects you are working with.
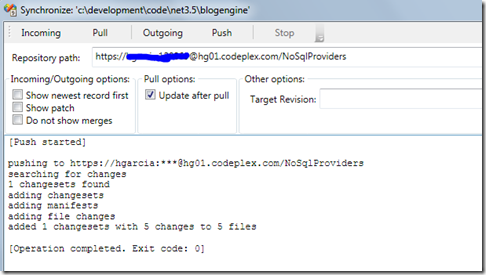
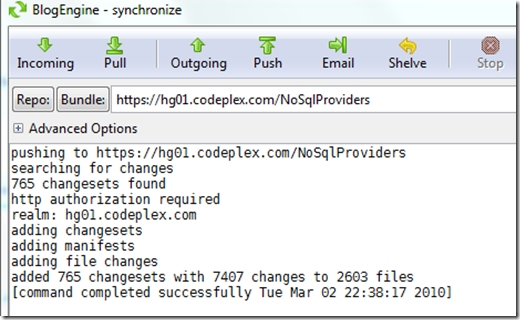
At this moment you are ready to push the code to your new project, just open the synchronize window from TortoiseHg and click push.
Once this is done, go to the source code tab in Codeplex and take a look, notice that you should have all commits from the original project plus any new commits done into your clone, in this case I added three commits after cloning.
From inside Visual Studio
Or course this works from inside Visual Studio as well if you have the Hg plug-in installed