Choo application setup and first elements.
Published on Nov 26, 2016Other articles in the Choo series.
What's choo
Choo is "another" front end JS framework but takes a "more" functional approach to building UI's than other frameworks out there.
It has a very minimal interface and the learning curve is minimal. After looking at some of the examples in the repo I decided to install it and take it for a spin.
I'm particularly interested on exploring how testable the code will be and how the application will grow (maintainability).
The incredible TV series tracker
The idea is to create a simple application that will allow us to track the Tv shows that we are watching.
Requirements for the first iteration
- Add a new tv show to the list
For this iteration we will not be adding a back-end.
Getting started
We will start by installing the choo-cli and creating the scafold of our application
Now if we run npm start your default browser should open with the basic application running.
The project comes configured with budo a development server designed to work with browserify. It provides live-reload and just in time compilation of your modules via browserify.
If we look at the package.json file we will see this:
"start": "budo ./client.js --live --pushstate --open -- -g es2040"
You will notice that we are asking budo to run a javascript file that acts as the entry point for our application. If you open the client.js you will see this.
  const choo = require('choo')
  const app = choo()

  app.model(require('./models/app'))

  app.router((route) => [
    route('/', require('./pages/home'))
  ])

  const tree = app.start()

  document.body.appendChild(tree)
Budo will generate a plain html file by default but we can tell budo what file to use or simply use a convention and create an index.html file in thefolder where budo runs from.
Here is our html file, we are adding bootstrap to help us here with the initial styling of the application.
  <!DOCTYPE html>
  <html>
    <head>
      <meta charset="utf-8">
      <title>Tv series</title>
      <link rel="stylesheet" href="https://maxcdn.bootstrapcdn.com/bootstrap/4.0.0-alpha.5/css/bootstrap.min.css" integrity="sha384-AysaV+vQoT3kOAXZkl02PThvDr8HYKPZhNT5h/CXfBThSRXQ6jW5DO2ekP5ViFdi" crossorigin="anonymous">
    </head>
    <body>

    </body>
    <script src="client.js"></script>
  </html>
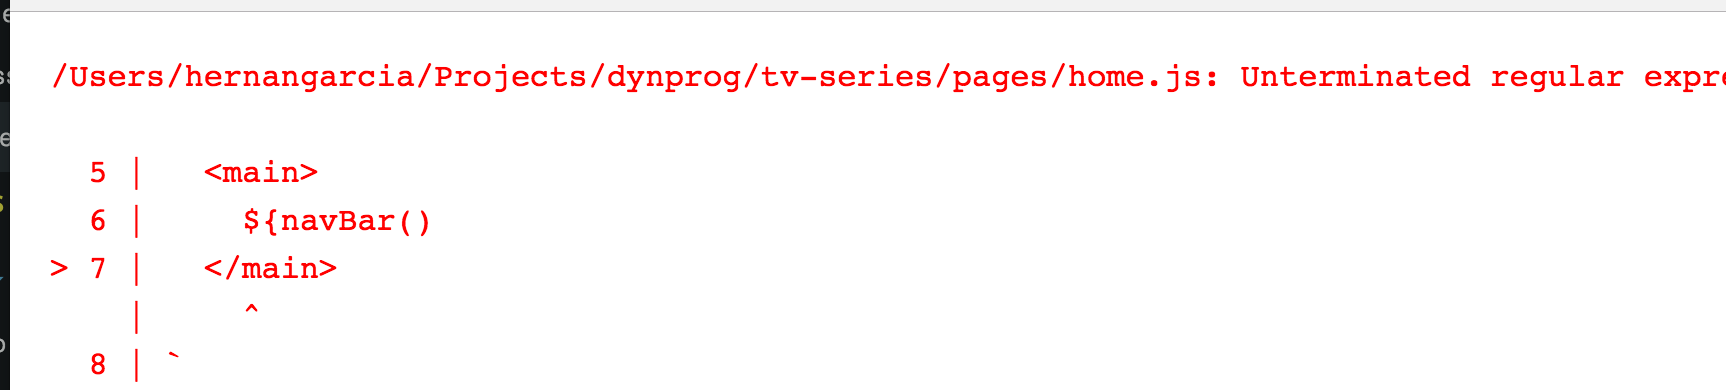
Budo will display errors in the browser and the console, clearly indicated, what helps to get things out of the ground until is time to start adding tests.


Let's add our first element
We will use the choo-cli to help us generate a new element
The whole idea of choo is that element and pages are just functions that return DOMElements. By default choo uses tagged template strings to build those elements. In this case is using the bel package.
It looks like JSX but is not, they are just strings. You can write your elements as you would any other html in your site and use JavaScript expressions to interpolate or inject other elements.
This hopefully will be clearer later on when we build our shows list.
If you want to refresh on tagged template literal check this article on MDN.
Open your favorite editor and change the content of the element function as shown below:
  function navbar () {
    return html`<nav class="navbar navbar-light bg-faded">
    <button class="navbar-toggler hidden-lg-up" type="button" data-toggle="collapse" data-target="#navbarResponsive" aria-controls="navbarResponsive" aria-expanded="false" aria-label="Toggle navigation"></button>
    <div class="collapse navbar-toggleable-md" id="navbarResponsive">
      <a class="navbar-brand" href="#">Tv series</a>
      <ul class="nav navbar-nav">
        <li class="nav-item active">
          <a class="nav-link" href="#">Home <span class="sr-only">(current)</span></a>
        </li>
      </ul>
      <form class="form-inline float-lg-right">
        <input class="form-control" type="text" placeholder="Search">
        <button class="btn btn-outline-success" type="submit">Search</button>
      </form>
    </div>
  </nav>`;
  }
Now we need to add the element to our page.
We will open the /pages/home.js file and we will require the new element and replace the current markup with a call to the NavBar.
  const html = require('choo/html'),
    navBar = require('../elements/navbar')

  module.exports = (state, prev, send) => html`
    <main>
      ${navBar()}
    </main>
  `
Go to your browser and you should see the NavBar rendering properly.

Adding shows
We could start developing this either from the UI or the model. Since we know how to create elements, let'd start with the UI.
We will use the choo-cli again.
choo generate element add-show
Change the code inside the navBar function with the following.
  function addShow () {
    return html`
      <div class="row">
        <form>
          <div class="form-group col-xs-5">
            <label for="title" class="col-xs-2">Title</label>
            <div class="col-xs-10">
              <input type="text" class="form-control form-control-sm" name="title" id="title">
            </div>
          </div>
          <div class="form-group col-xs-3">
            <label for="title" class="col-xs-5">Season</label>
            <div class="col-xs-7">
              <input type="number" step="1" min="0" class="form-control form-control-sm" name="season" id="season">
            </div>
          </div>
          <div class="form-group col-xs-3">
            <label for="title" class="col-xs-5">Episode</label>
            <div class="col-xs-7">
              <input type="number" step="1" min="0" class="form-control form-control-sm" name="episode" id="episode">
            </div>
          </div>
          <div class="form-group col-xs-1">
            <button type="submit" class="btn btn-primary btn-sm">Add</button>
          </div>
        </form>
      </div>`
  }
Now we need to create a model that will represent the show and "bind it" to the UI. Once again we can use the generator to create the new model.
choo generate model show
The model will expose the properties and contains the reducer functions that will tie everything together.
Change the state of the model to look like this.
  state: {
    title: '',
    season: 0,
    episode: 0
  },
And we will add the reducer to update the property values.
  reducers: {
    updateTitle: (data, state) => ({ title: data }),
    updateSeason: (data, state) => ({ season: data}),
    updateEpisode: (data, state) => ({ episode: data})
  },
We need to tell choo about this model, so open the client.js file and add the following line.
app.model(require('./models/show'))
Now we will modify the add-show element as follow. We create a wrapper to send events and we add an event handler in each input.
We also set the value of those input elements to the property we want
  function onInput(action, send) {
    return (event) => {
      send(action, event.target.value);
      event.preventDefault();
    }
  }

  ...

  <input type="text" oninput=${onInput('show:updateTitle', send)} class="form-control form-control-sm" name="title" id="title" value="${state.show.title}">

  ...

  <input type="number" oninput=${onInput('show:updateSeason', send)} step="1" min="0" class="form-control form-control-sm" name="season" id="season" value="${state.show.season}">

  ...

  <input type="number" oninput=${onInput('show:updateEpisode', send)} step="1" min="0" class="form-control form-control-sm" name="episode" id="episode" value="${state.show.episode}">
We could add a span in the element as well to display the values and validate that the binding is correct, but that's not really what we want to do.
Let's add some tests.
Setting tape
I usually use Mocha for testing my projects, but I recently read this article about tape and though it could be a great idea to try it for this projet. Let's install it first.
npm i tape tape-watch tap-diff --save-dev
We are adding tape-watch to be able to have the tests running watching for file changes. and tap-diff for an even nicer error message.
In the package.json file we will change the default test: script line and add a second one.
  "test": "tape tests/**/*.js",
  "test-w": "tape-watch tests/**/*.js"
We create our folder structure /tests/models and we add a file for the show model tests.
We will tests the reducers, that are returning the expected values.
In this case we add some tests to make sure we convert the episode and season values to integers and default to zero if the text field is emptied.
  "use strict";

  const test = require("tape"),
    show = require("../../models/show"),
    choo = require('choo'),
    app = choo();

  app.model(show);

  test("should update the show.title", (assert) => {
    const result = show.reducers.updateTitle("New title");
    assert.equal(result.title, "New title");
    assert.end();
  });

  test("should update the show.season to zero", (assert) => {
    const result = show.reducers.updateSeason("");
    assert.equal(result.season, 0);
    assert.end();
  });

  test("should update the show.season as a number", (assert) => {
    const result = show.reducers.updateSeason("12");
    assert.equal(result.season, 12);
    assert.end();
  });

  test("should update the show.episode to zero", (assert) => {
    const result = show.reducers.updateEpisode("");
    assert.equal(result.episode, 0);
    assert.end();
  });

  test("should update the show.episode as a number", (assert) => {
    const result = show.reducers.updateEpisode("30");
    assert.equal(result.episode, 30);
    assert.end();
  });
After the tests the reducers now look like this:
  updateTitle: (data, state) => {
    return {title: data};
  },
  updateSeason: (data, state) => {
    return {season: parseInt(data || 0, 10)};
  },
  updateEpisode: (data, state) => {
    return {episode: parseInt(data || 0, 10)};
  }
Saving the show
We will create a new model shows that will contain the list of shows. In some demos, the list and the properties for the individual items are all stored in the same model.
choo generate model shows
This time since we will start by writting our tests and we will let our tests drive the design.
  "use strict";

  const test = require("tape"),
    shows = require("../../models/shows");

  test("Adding a show to the shows.llist", (assert) => {
    const data = {title: "new show", season: 1, episode: 3},
      results = shows.reducers.add(data, shows.state);

    assert.equal(results.list.length, 1, "should increase the size of the list");
    assert.equal(results.list[0].title, data.title, "should add the new show");
    assert.end();
  });
The implementation is fairly simple.
const shows = {
  namespace: 'shows',
  state: {
    list: []
  },
  reducers: {
    add: (data, state) => {
      return {list: state.list.concat(data)};
    }
  },
  effects: {
  },
  subscriptions: [
  ]
}

module.exports = shows
And we hook everything together on an event handler in the ADD button. We also add a reset action in the show model to make sure we clear up the data for the show after we add it to the list.
  function onSubmit(send, state) {
    return (event) => {
      event.preventDefault();
      send('shows:add', state.show);
      send('show:reset');
      return false;
    };
  }

  ...

  <button type="submit" onclick=${onSubmit(send, state)} class="btn btn-primary btn-sm">Add</button>
Displaying the list of shows
We will create two elements a show-list and a show. The show-list will be de table wrapper and the show element will be used to display each row.
  choo generate element show-list
  choo generate element show
The code for the show element is very simple.
  function show (show, state) {
    return html`<tr>
      <th scope="row">${show.title}</th>
      <td>${show.season}</td>
      <td>${show.episode}</td>
    </tr>`;
  }
The one for the show-list is a bit more interesting, notice how we are just mapping on the elements of the list and call the show element that is just a function.
  function shows (state) {
    return html`<table class="table">
      <thead>
        <tr>
          <th>Title</th>
          <th>Season</th>
          <th>Episode</th>
        </tr>
      </thead>
      <tbody>
      ${state.shows.list.map((s)=> {
        return show(s, state);
      })}
      </tbody>
    </table>`;
  }
We add the call to the new component in the home page and we are ready to take it for a spin.
  const html = require('choo/html'),
    navBar = require('../elements/navbar'),
    addShow = require('../elements/add-show'),
    showList = require('../elements/show-list')

  module.exports = (state, prev, send) => html`
    <main>
      ${navBar()}
      <div class="container">
        ${addShow(state, send)}
        ${showList(state)}
      </div>
    </main>`
Conclusion and things to explore in future articles
Choo looks like a capable library with the basic building blocks for data driven applications. I will like to explore in future articles more real life scenarios with complex data models and reacher requirements.
Some possible articles
- Write tests for views.
- Replace
standardwitheslintfor linting. - Edit and remove shows.
- Add source for the TV shows (Netflix, Hulu, Crave, CBC, etc)
- Use AJAX and effects.
- Explore how to clean up the code a bit more and reduce the duplication.
- Take a look at server side rendering.
Resources
- Github code for this article
- Choo online manual
- Intro video by Ron Ross
- Choo-cli video another video by Ron Ross