Choo linting with eslint.
Published on Nov 29, 2016Other articles in the Choo series.
Reasons to remove standard
The default template for the application that we created using the cho-cli uses standar as the linter.
There is nothing wrong with standard if you agree with the conventions and rules that standard enforces.
I'm a bit old style and I really like my semi colons and my strings double quoted. Just for that I will have to switch.
Besides that I like the flexibility that eslint provides.
So the first thing I will do is uninstall standard and remove it's configuration from the package.json file
Delete the following lines from the package.json
  ,
  "standard": {
    "ignore": [
      "scripts"
    ]
  }
Run the following command to unsinstall standard and snazzy.
npm uninstall standard snazzy --save-dev
Installing and configuring eslint.
You can say that this is the inverse of what we just did. Let's install eslint via npm.
npm i eslint --save-dev
We will need to create an eslint configuration. There are many ways to do this, in this case we will do it on first run.
Let's change the package.json lint script to the following.
"lint": "eslint",
And we will run the script with the -- --init flag as shown below.
This should generate a config file that looks something like this.
  module.exports = {
      "env": {
          "browser": true,
          "commonjs": true,
          "es6": true
      },
      "extends": "eslint:recommended",
      "rules": {
          "indent": [
              "error",
              4
          ],
          "linebreak-style": [
              "error",
              "unix"
          ],
          "quotes": [
              "error",
              "double"
          ],
          "semi": [
              "error",
              "always"
          ]
      }
  };
We will change the indent rule from 4 to 2 and we will add a new rule for strict mode.
  "strict": [
    "error",
    "global"
  ],
  "indent": [
      "error",
      2
  ],
We will also create a .eslintignore file in the root and we will add the node_modules folder to it.
We will now change the lint script in package.json to the proper call.
"lint": "eslint **/*.js tests/**/*.js"
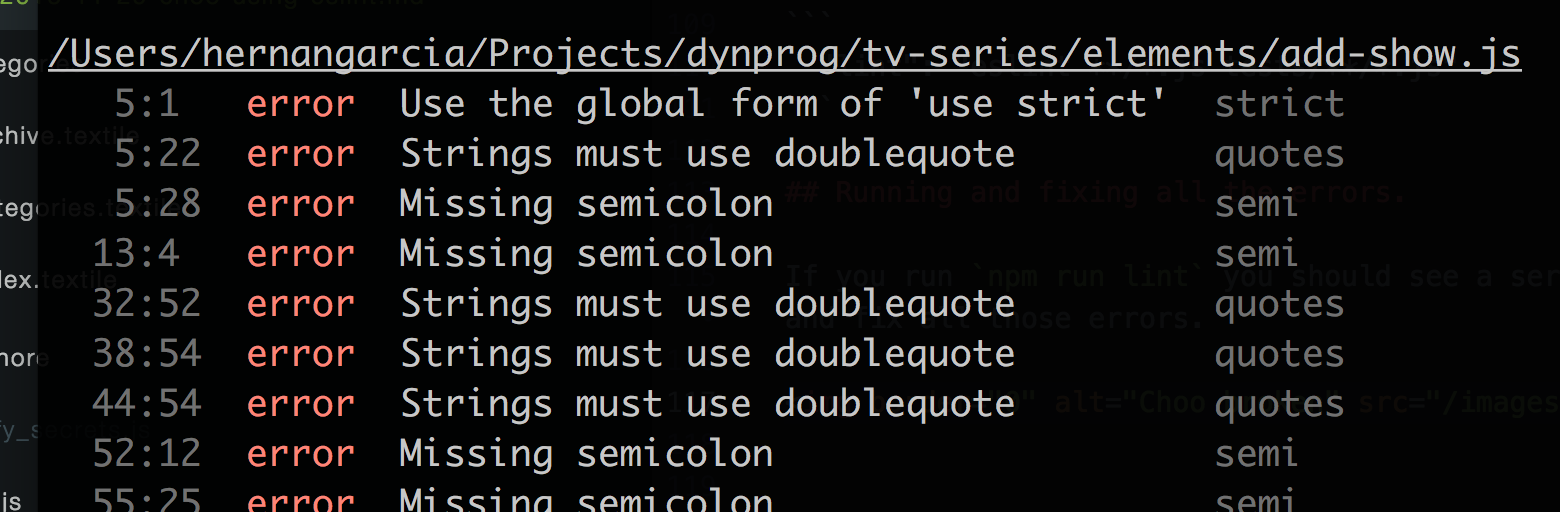
Running and fixing all the errors.
If you run npm run lint you should see a series of errors for each file. We will go ahead and fix all those errors.
Changing the templates for the generators to comply with the new style rules.
You will notice that if you run choo generate the code generated does not adhere to any of the rules we are trying to enforce. That's easily fixable.
Open the .generatos folder inside your project and you will find the templates used by the choo-cli.
For example this is how the element template looks after the changes.
  // Element: <%= name %>
  "use strict";

  const html = require("bel");

  function <%= name %> () {
    return html`<div> <%= name %> </div>`
  }

  module.exports = <%= name %>;
Having the templates as part of the project is very clever, since we may use different conventions in different projects, or we may want to modify the templates slightly between projects and those changes will only affect the current project.